How are all of our Pretty Little Peacocks Today?
Today we are honored to have a great friend and former Pinquette joining us with a FABULOUS Tutorial: Create the Perfect StarBurst!
Please join me with a Warm Welcome Back for Janet Royer from Janet's Creative World
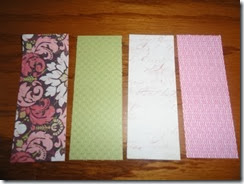
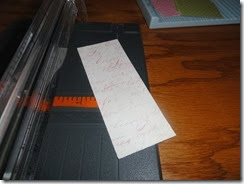
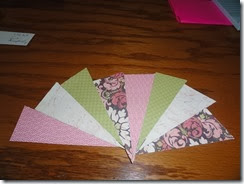
Gather 4 coordinating papers. I used CTMH and 2, using both sides of the paper (4) Cut to 1 1/2 inches by 4.
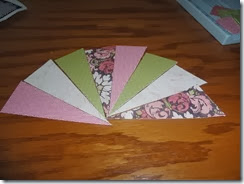
Cut from top right corner to bottom left corner, forming 2 diagonals.
Arrange in a pleasing combination of patterns.
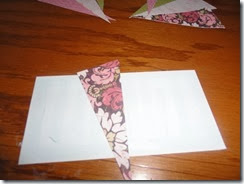
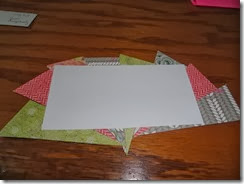
Cut a base, I cut mine at 5 1/2 to 4 1/4 to fit my card base. Mark the center point top and bottom. Apply glue to the entire base. This is where we’ll lay out our pieces. Begin with placing one center piece on your marks, then apply each piece to the side. Make sure you cover the base.
To cover the base, the papers will NOT be lined up at the top or even the bottom… Don’t be alarmed.
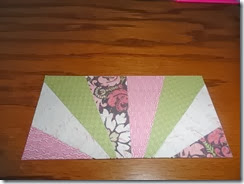
When you’ve applied all the pieces, flip the base over and trim the edges around your base.
The Perfect SunBurst! All ready for your project.
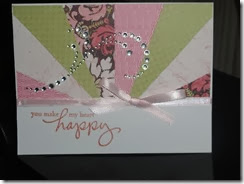
I added mine to a white card base, using ribbon to cover the bottom of the base. Stamped “You Make Me Happy (Amuse Stamps) in Sorbet ink (CTMH) and added ribbon and some bling (CTMH). This reminds me of my Grandmother who quilted and often we saw our outgrown clothes in the quilts she made. She’s gone now but I think of her often and because of her and others in my family, the love of creating and crafting was instilled early! Thanks for stopping by today!


17 comments:
Nice to "meet" you Janet. Loved your tutorial! My method for star bursts is not nearly so neat and orderly. Thanks for sharing today!
So happy to see your smiling face back here, Janet!! I've NEVER…that's right NEVER done a starburst but I think with your help I can add that to my list of accomplishments very soon. Your card is lovely!
Janet, this is such a wonderful technique....I have yet to try a starburst card myself, but feel less intimidated now!! Thank you so much for returning to join us today!!! Hugs!!!
Thank you all for the kind words. I'm thrilled to be able to guest today. I had so much fun putting this together for you.
Awesome job Janet :) Love the look of this and will have to try it! Thanks for the awesome tutorial.
Thanks for teaching this tip, Janet! I must try it sometime!
Teresa
just wanted to thank you for the beautiful stuff that I got today in mail I love it all. thank you so much hugs
This is so great! Thanks for a fabulous tutorial!
Thanks for the awesome tutorial Janet!!!!
Love it! Thank you for the great tutorial! Will be giving this a try! TFS!
This is beautiful ..I have read other complicated methods for this technique...yours is cool.Thank you for sharing it.Thank you jessica too!
Cheers
Dr Sonia
Back to tell you I have pinned it here :Card tutorials with link back to this blogpost.
beautiful card. Love the starburst cards. they are so beautiful.
Marcia
mvanhoosan@gmail.com
Love your bright card. I have made one of these and I hate to tell you just how long it took me to get it accomplished. Your instructions might make the process a little easier for me.
Kimberly
Very pretty. I love the look of it. It reminds me of a quilt too.
Thank you so much for this tutorial!! I love the look of a card like this but could never quite accomplish it
Janet this card is pretty. I'll have to give this a try. Thanks for sharing with us.
Post a Comment