Showing posts with label Pinque Peacock Shop. Show all posts

May 18, 2014

Bring May Flowers Blog Hop WINNER ANNOUNCEMENT


Happy Sunday to all of our Pretty Peacocks

Jessica here with a 
WINNER'S ANNOUNCEMENT 
from the 
BRING MAY FLOWERS BLOG HOP


THANK YOU TO ALL WHO HOPPED ALONG
AND
ENCOURAGED OUR TALENTED DESIGN TEAM!

We hope you gained some wonderful inspiration along the way
and are already
GETTING CRAFTY YOURSELVES.

My random psychic first "suggested" I visit the 7th Hop Stop in the Lineup


The 7th Hop Stop was Pinquette Rebecca's Sweet Blog....BloomingPink


Then my random psychic "told me" to see who left the 3rd comment out of 11 that were there.

Comment #3 belonged to Cathy Derouche and here is what she said

Blogger Cathy said...
I love your card, I got a chuckle..New follower here.
cathyplus5.blogspot.com

Sun May 11, 09:27:00 AM EDT

CONGRATULATIONS ON YOUR WIN CATHY D!
You are the Winner of the $10 Gift Certificate
Please contact me by email or on Facebook to claim your prize!

***Friends, DON'T FORGET ... You can enter our Monthly Challenge for more chances to WIN, WIN, WIN***

You have until May 30th to join in our Current Monthly Challenge
^^^click here^^^


April 25, 2014

PINQUE PEACOCK has a Special Guest.... Welcome Guest Designer Irene Chapman

How are all of our Pretty Little Peacocks Today?

♥ ♥ ♥ ♥ ♥ ♥ ♥ ♥ ♥

Please join me with a Warm Welcome for today's
Guest Designer Corinne Jones


♥ ♥ ♥ ♥ ♥ ♥ ♥ ♥ ♥
Hello, my name is Irene Sherman
You can find my creations on my blog at Irene's Card Creations
I am a mother of 5 kids, all young adults now.
I work full time and love to make cards/projects
in my free time.
I am on the Spectrum Noir Design Team
and also Simply Betty Design Team.

The card I made here is for a dear friend
that is getting married. 

This card has the digi from "Milk Coffee" called:
Tiffany in Roses Bridal Gown.
I wanted this to be very elegant because that
is how this bride is.  Her colors are the colors I used on
this card.  When I placed the flowers on this card, it always
looks best to not have everything perfectly in order.
Having something that sticks up, odd numbers of flowers, etc.,
makes it look soo much better.  I ordered this pin from Pinque Peacock and
it worked soo perfectly to come out from the flowers and the color matched perfectly.
When I use the pins, I put a drop of Glossy Accents on the end, if it sticks out from under the flowers.
This keeps anyone from getting "stuck" from the pin.  Works great. Or use a wire
cutter to cut the stem down a little.  They have many sizes of pins so you can get whatever size best suites
your needs.  They make the pins to match what you want and I gave them ideas of what I wanted
and loved everyone I received.  Great "accent" to any project/card.
I used a diecut (music notes) and the coloring was done with Spectrum Noir Markers.
I hope you enjoy it.

Irene, thank you so much for joining us here at PINQUE PEACOCK!!!
Be sure to visit Irene at her blog Irene's Card Creations to
see more of her beautiful creations!!!
♥ ♥ ♥ ♥ ♥ ♥

Custom order you Stick Pins with the BEAD BUFFET...
you can even chose beads for you own personal use!!!
~~~***~~~***~~~
JOIN US NOW, for our 4th Challenge!

The theme for this challenge is
FLOWERS
Snag Our Badge

~~~***~~~***~~~

Be sure to also check out the new
CRAFTY KIT CLUB
on FACEBOOK


April 24, 2014

Product Spotlight: Beaded Stick Pins with our Lovely Guest Designer - Christy L.

How are all of our Pretty Little Peacocks Today?

Today's 
IS BROUGHT TO YOU BY 
OUR FABULOUS AND TALENTED GUEST:


Christy Lepine of Christy's Crafty Corner Blog {CLICK HERE}
You can also visit Christy at her YouTube Challenge {CLICK HERE}

<<>>
Hello and welcome to all of you lovely Peacocks!

My name is Christy and I'm here today because our fearless leader Jessica asked if I would like to be a guest designer. My reply was.......letmethinkaboutthatoneminute.....YES!!  Talk about a no-brainer!!

OF COURSE I would love to pop in and tell everyone about one
of my FAVORITE Pinque Peacock's products:

Beaded Stick Pins


These stunning pins perfectly accent many projects.
The beads are GORGEOUS and fit so many different styles. 


~~**~~**~~**~~
My favorite way to use the Beaded Stick Pins is as a "bridge"
between different parts of my projects.


~~**~~**~~**~~
I like to be able to help move the eye from one collage to another.


~~**~~**~~**~~
 
Though sometimes, I just like to use them because they are just SO beautiful!


~~**~~**~~**~~
 
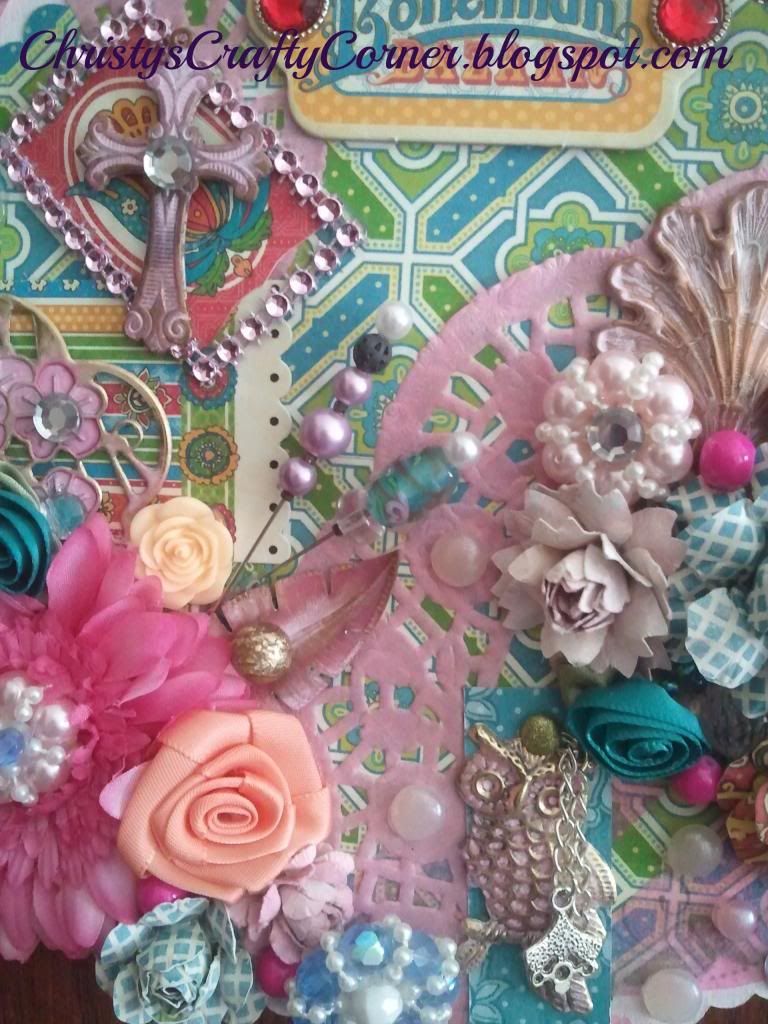
I created the Springtime In Paris canvas just for today's post. 


As you look at the project you'll see that I also used a few
 more Pinque Peacock goodies when I created it.
The Elegant Florals can really elevate the look of any project.
On this canvas I chose to alter mine.


~~**~~**~~**~~

As you watch the video you'll notice that I also used the


Thank you for letting me share my love for these amazing
products and I hope to see you again soon!

~Christy
♥ ♥ ♥ ♥ ♥ ♥
Christy.... thank you so much for joining us here at PINQUE PEACOCK!!!
Be sure to visit Christy at her blog Crafty Corner Blog
to see more of her beautiful creations!!!
♥ ♥ ♥ ♥ ♥ ♥
~~**~~**~~**~~
LINK UP YOUR PROJECT...
For Our 4th Challenge!
The theme for this challenge is
FLOWERS....
head on over and join in the fun!!!
Snag Our Badge
***************
And then head on over to the NEW PINQUE PEACOCK Crafty Kit Club
Fan Page and check out all the rage there!!!!

April 20, 2014

Spring Time Blog Hop WINNER ANNOUNCEMENT

Happy Easter Pretty Peacocks

Jessica here with a 
WINNER'S ANNOUNCEMENT 
from the 
Spring Time Blog Hop


THANK YOU TO ALL WHO HOPPED ALONG
AND
ENCOURAGED OUR TALENTED DESIGN TEAM!

We hope you gained some wonderful inspiration along the way
and are already
GETTING CRAFTY YOURSELVES.

The Winner was Selected from DAY 2
AND
was LUCKY Comment #5
5 
Tristan Robin Blakeman said...
As promised, I just finished hopping day #2. Hillary's page is still busy being constructed, so I'll check back later in the weekend to see if it's up and running!

CONGRATULATIONS
TRISTAN
and
THANK YOU FOR HOPPING WITH US THIS MONTH!

You are the Winner of the $10 Gift Certificate

Please contact me to claim your prize!


March 24, 2014

Product Spotlight - with Pretty Little Peacock, Faithe W.

Hello all Pinque Peacock People!

My name is Faithe. I am a member of several design teams, a blogger/crafter, and I am super excited to be telling you about a really cool, and in my opinion, highly underrated product in this edition of Pinque Peacock's Product Spotlight: The Sponge Dabber.


I first saw the sponge dabbers at Scrapfest (a scrapbook expo in Oshawa, Ontario) a few years ago. I was at a stamping booth trying out their new line of stamps and making a Christmas tag. The lady at the booth suggested I add some pop to my project by inking the edges. I had no clue how to go about this as all that was in front of me were big ink pads.  Surely, if I tried to ink my small project it would make a huge mess right? Thankfully make and take ladies are there to help you learn new things.  So she told me to take a sponge dabber and dab it onto the ink dabber.

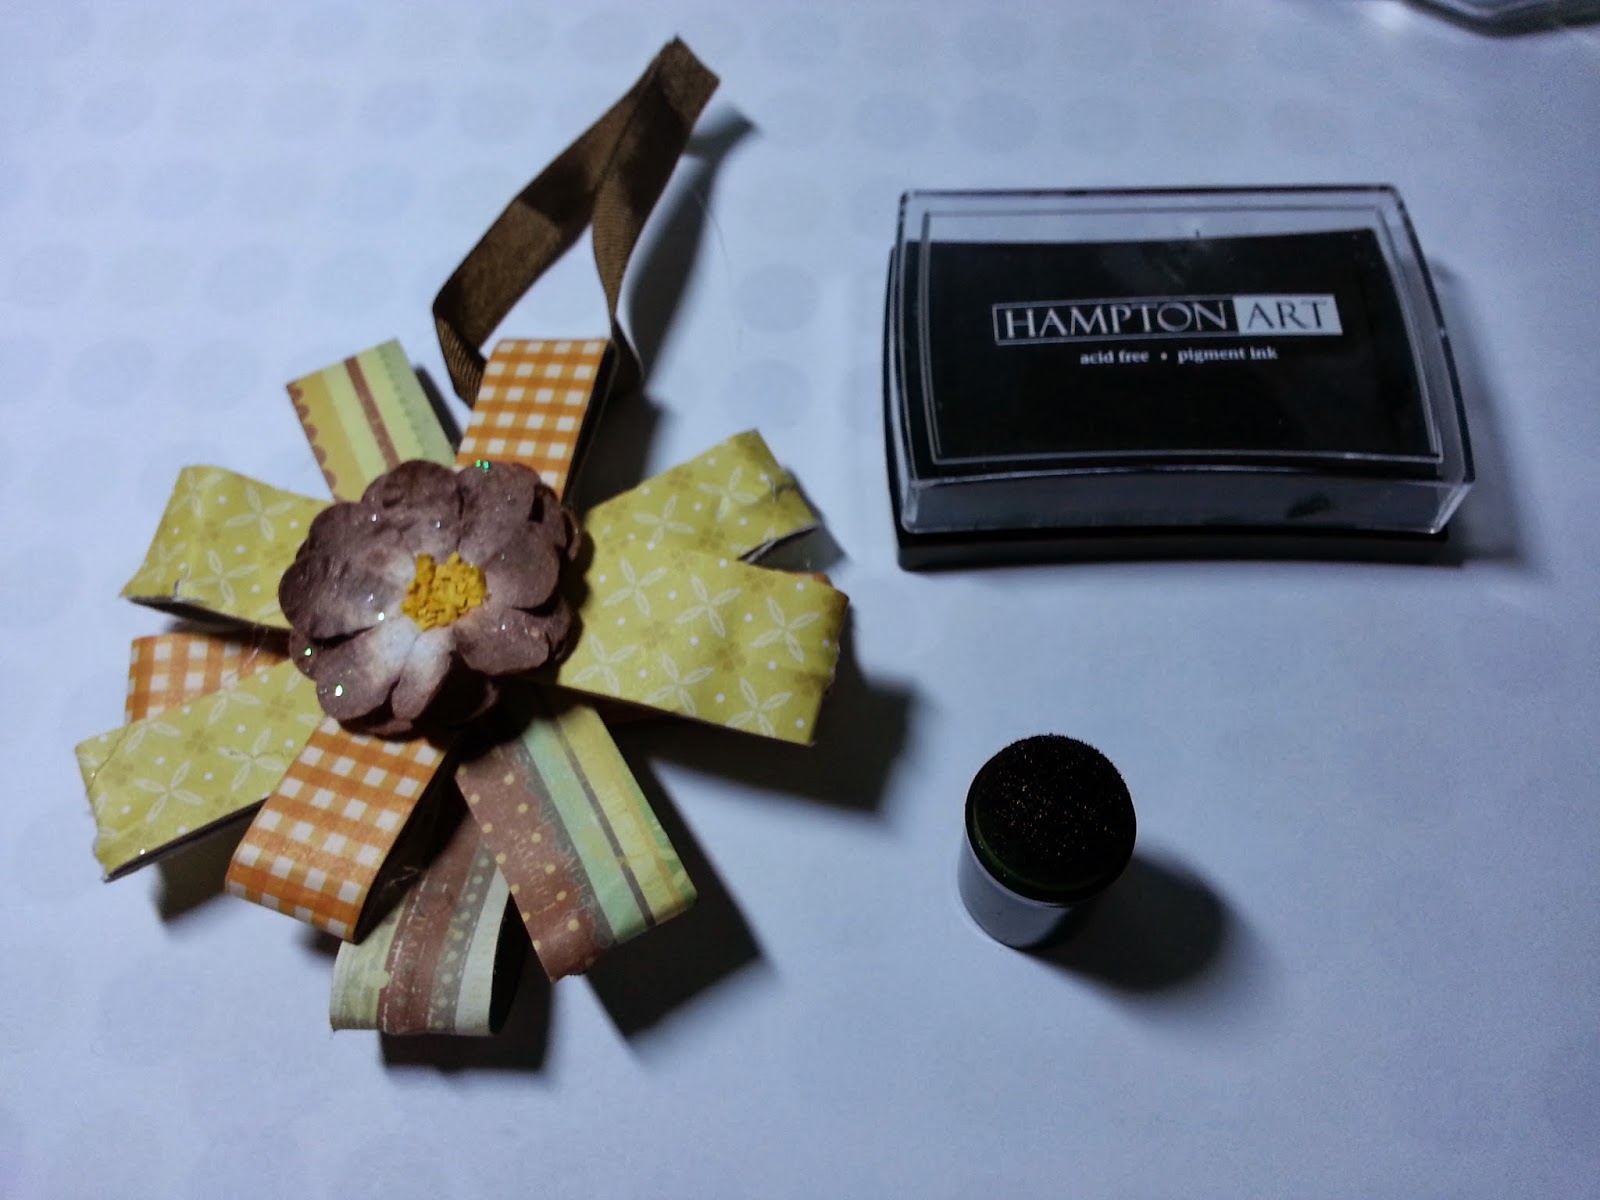
Then place the sponge dabber along the edges of your product. For an example, I am using a paper flower ornament that I would like to make look more distressed.


Continue doing this until all the edges of your product are covered.


Mine has more ink in some parts because I was going for a more rustic, distressed look.  It is, however, also easy to use this method to achieve clean smooth lines. 
(Here is an example of cleaner lines on a Christmas tag)

Please note, that after use of one color, you should clean your dauber well, or just buy one for each ink you intend on using it with . . . .or else this happens L :


I believe that the sponge daubers are an underrated product because they are easy to look over in a store. 

However if you get a chance I highly suggest going to the Pinque Peacock store and picking some up yourself because the possibilities are endless with use of these daubers. 
Direct Shop Link: Sponge Dabbers

One example of a use besides inking the sides of your projects is to create a cloud effect. We all know clouds appear to be light and fluffy.  In order to achieve this type of look, simply dab the dauber first on the ink pad then on your project in a random placement. Try to then go back over and layer your dabs. This creates a light and fluffy look to the clouds. Shown here I used black ink, which in turn created a storm cloud look.


You could also use your dauber to create flowers (shown here), fluffy and full trees or caterpillars all of which are perfect for spring.


So tell me, Pinque Peacock Friends, have you used this product before? 
If so, what unique ways have you used your dauber?